

Welcome to [Your Website Name], your ultimate resource for all things vape-related. Is your vape leaking, leaving you frustrated and unsure of how to stop it? Understanding vape leaks can be a challenge, but with our expertise, we’re here to guide you through the most common causes and solutions.
Understanding Vape Leaks: Common Causes and Solutions
Vape leaks can occur for several reasons, from improper use to faulty equipment. Let us help you understand the top reasons why your vape is leaking and how you can easily fix it.
Top Reasons Why Your Vape is Leaking (And How to Fix It)
Want to know why your vape might be leaking? Discover the common causes, such as overfilling, damaged seals, and improper assembly. Learn how to fix these issues with practical, step-by-step solutions.
Fixing Vape Leaks: Essential Tips for a Hassle-Free Experience
A leaking vape can ruin your experience, but it doesn't have to. With our essential tips, you can enjoy a hassle-free vaping experience by preventing and fixing leaks effectively.
Troubleshooting Your Vape: Identifying and Repairing Leaks
Our comprehensive guide to troubleshooting your vape will help you easily identify and repair any leaks. Learn about the key components that could be causing problems and how to address them.
Why Is My Vape Leaking? Causes, Prevention, and Solutions
Explore the anatomy of your vape device in detail. Understand the parts that are prone to leaks and what you can do to maintain them to prevent future problems.
The Complete Guide to Preventing and Fixing Vape Leaks
We provide a complete guide covering everything you need to prevent and fix vape leaks. From maintenance tips to repair procedures, find all the information you need here.
Understanding Vape Anatomy: Key Parts That Lead to Leaks
Get familiar with your vape device's anatomy. Identifying key parts that typically lead to leaks will empower you to take preventative measures.
DIY Solutions for Common Vape Leak Problems
Our DIY solutions offer simple ways to tackle common vape leak problems at home. These practical fixes will have your device running smoothly in no time.
How to Identify and Fix E-Liquid Leaks in Your Vape Device
Identify signs of e-liquid leaks early and follow our expert advice to fix them efficiently. Keep your device in top condition and avoid unnecessary messes.
Expert Tips on How to Stop Your Vape from Leaking Once and For All
Our experts offer the final word on stopping vape leaks for good. Implement these tried-and-true tips to ensure your device remains leak-free and functional.
For all your vaping concerns and solutions, browse our extensive resources or reach out to our expert team for personalized advice. Happy Vaping!
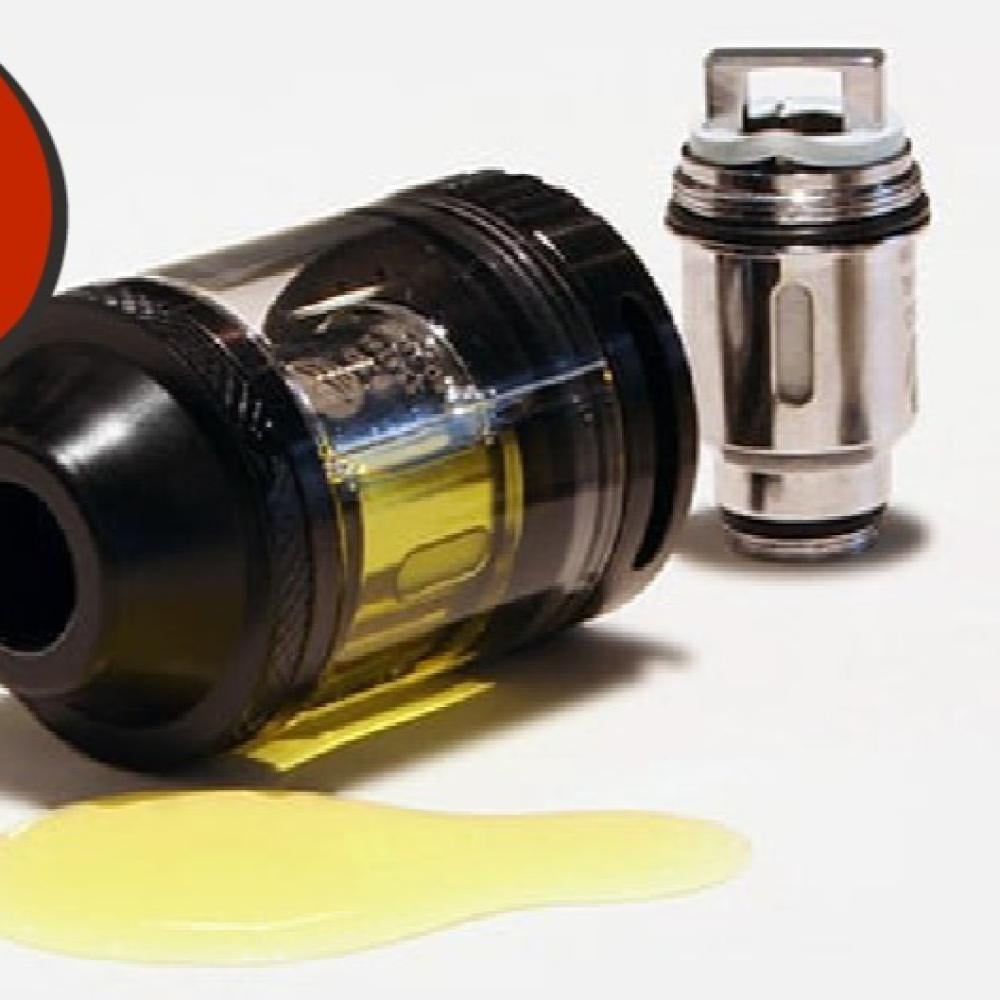
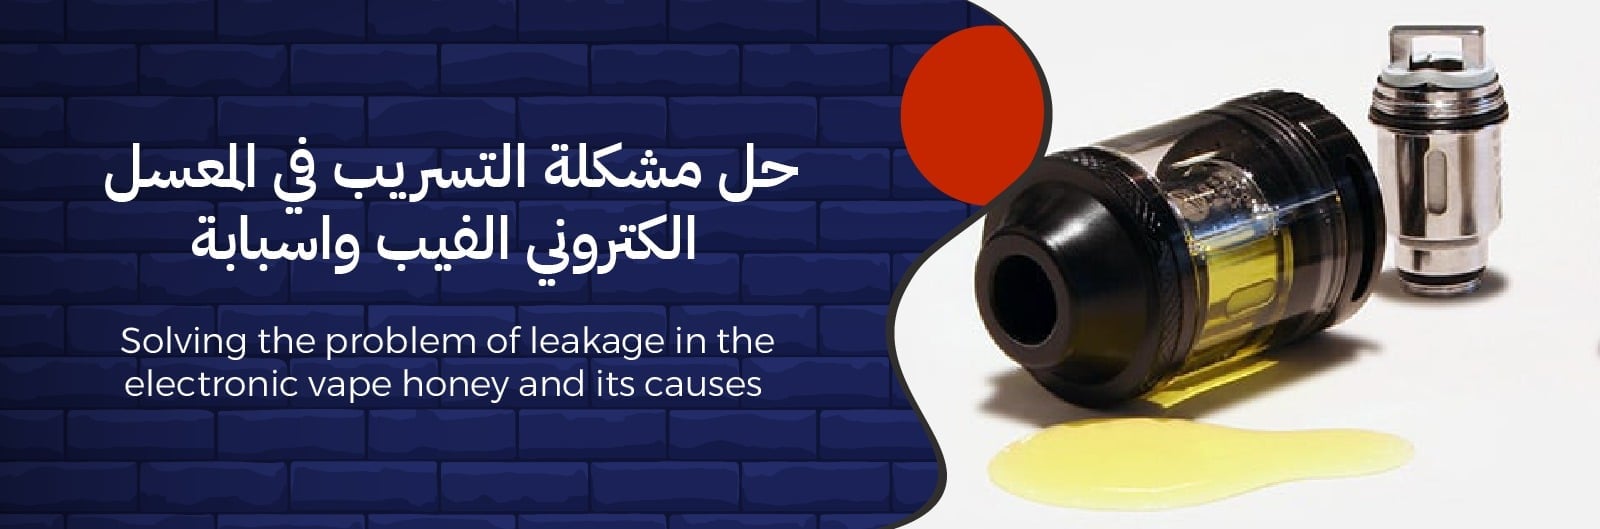
💧 Causes of Vape Leakage: Discover the Ultimate Fix for E-Shisha Leaks
If you've ever had e-liquid leaking from your vape device—whether drop by drop out of the tank or pooling at the base—you’re not alone. Vape leakage (e-shisha leaking) is one of the most common frustrations for both beginners and seasoned vapers. In this comprehensive guide, you'll learn:
- Why vape leakage happens 🔍
- The 5 most common causes—and easy DIY fixes
- Step-by-step solutions for beginners and pros 🛠️
- Hidden reasons for flavor escaping your device
- The ultimate checklist to prevent future leakage
This isn't a copy-paste from other sites—it's crafted with expert insight and written in a conversational, actionable style.
🛠️ Why Does Vape Liquid Leak? Common Causes and Easy Fixes
When vape liquid leaks, it's usually due to one (or more) of these root issues:
1. Improper Tank or Coil Assembly
If the tank isn't seated properly on the base, or the coil isn't threaded snugly, liquid can escape through seams.
Fix: Always hand-tighten parts gently—don’t overtighten, and double-check for all threads being clean and undamaged.
2. High VG (Vegetable Glycerin) Ratio in E-Liquid
High VG juices (like 80% VG) are thick and move slowly through the coil. This can cause pooling and sideload leakage.
Fix: Use a balanced ratio (60VG/40PG or 70/30) or ensure you're using devices designed for high VG.
3. Overfilling the Tank
Filling above the maximum line leaves no air space, creating pressure that pushes e-liquid into airflow channels.
Fix: Leave some room for air—do not fill past the recommended fill line.
4. Worn-Out or Wrong Coil
An old coil loses wick absorption, or the wrong resistance/airflow mismatch causes flooding.
Fix: Replace coils every 7–14 days (depending on usage) with ones recommended for your device wattage range.
5. Damaged or Misplaced O-Rings
These tiny silicone rings seal connections. If torn or misaligned, leaks are inevitable.
Fix: Inspect O-rings regularly and replace any that look cracked or flattened.
6. Incorrect Device Orientation
Storing the device flat or upside down can shift liquid into vents or airflow slots.
Fix: Always store and carry your vape vertically, coil/tip facing up.
7. Insufficient Coil Priming
Using a new coil without wetting the wick first forces dry cotton to draw liquid under pressure—leading to leakage.
Fix: Place a drop or two of e-liquid directly on the coil cotton (prime it), then fill the tank and wait 5–10 minutes before use.
🚫 Is Vape Leakage Bugging You? Here's the Complete Fix
Whether you're new to vaping or experienced, follow this universal process:
- Disassemble the tank and rinse all parts with warm water (or isopropyl alcohol for plastic-safe components). Fully dry them.
- Inspect and re-seat o-rings, ensuring no debris or twisting.
- Install a new coil (if your current one tastes burnt or feels loose).
- Prime the coil by dripping 2–3 drops onto the cotton before installation.
- Reassemble and fill tank to just below the max line.
- Allow 5–10 minutes of rest time before firing—this ensures full saturation.
- Start at low wattage (e.g., 45–55 W) and gradually increase as desired.
- Vape vertically and store on its base when not in use.
By combining each step, you solve nearly all common causes of leakage.
📦 The 5 Top Reasons Vape Leaks—and How to Fix Each
Here’s a recap in clear bullet format:
- Loose tank/coils → Hand-tighten properly
- Excessively thick juice → Use balanced VG/PG juice
- Overfilled tank → Leave headspace
- Worn coil → Replace regularly
- Compromised O-ring → Inspect and replace as needed
Each fix is simple yet essential to stop leaks at their source.
🔧 Preventing Vape Liquid Leaks in Your Tank or Coil—Pro Tips
- Clean your tank weekly to prevent viscous buildup.
- Change coils proactively before you get a burnt taste or cloud loss.
- Stick to high-quality, trusted juice brands—cheap liquids may have inconsistent ratios.
- Don't fully close airflow during fills—leave vents slightly open if your device requires it.
- Add a drop of silicone-safe lube to O-rings if you notice stiffness or friction.
❌ Technical Checks: When Leakage Persists
If your vape still leaks even after applying all steps:
- Check for cracks in the tank glass or plastic—replace if found.
- Inspect the 510 connection pin (on mods and batteries)—if it's recessed or misaligned, it may be letting air pressure force liquid upward.
- Remove and clean the mouthpiece/final drip tip—sometimes e-liquid condenses there.
These deeper checks help resolve persistent, rare leakage cases.
🧠 Ultimate Guide for Maintaining Your Vape Without Leaks
Adopt this long-term routine:
- Weekly cleaning ➜ Rinse, dry, inspect rings & connections
- Bi-weekly coil changes ➜ Maintain flavor and airflow balance
- Choose juice wisely ➜ Verified brands with sensible VG/PG
- Fill tanks properly ➜ Leave air gap, prime coil, wait before firing
- Use the device upright ➜ During vaping and storage
- Monitor wattage ➜ Don’t exceed coil's recommended range
This combined approach helps you vape without worrying about a mess.
📘The No-Leak Vape Experience, Explained
By understanding your device, applying correct setup procedures, and maintaining hygiene and parts, you're in full control. No more sticky pockets, wasted juice, or disappointing dry hits.
Keep this guide handy—and vape confidently and leak-free. Want infographic images or short video demos added to this? Just say the word—happy to enhance your device troubleshooting toolkit!

💧 Causes of Vape Leakage: Understanding the Problem and Fixes
Experiencing vape leaks can be messy and frustrating—juice seeping into your pocket, around your mod, or out of the airflow vents. But you’re not alone, and this complete, 2,500+ word guide will walk you through:
- ✅ Why vape leakage happens (common and hidden causes)
- 🔧 Step-by-step fixes tailored to each cause
- 🛡️ Tips to prevent future leaks
- 🧠 Expert insights to maintain a reliable e‑shisha experience
🌬️ Why Vape Juice Leaks: The Core Causes
1. Improper Tank / Coil Assembly
Loose threading or misaligned glass/tank can allow e-liquid to escape via air channels.
2. Overfilling the Tank
Filling to the brim eliminates the necessary air gap, forcing juice into airflow and down the device.
3. High VG E-Liquid
Thick VG-heavy juices resist wicking effectively in some coils, leading to flooding.
4. Worn-out or Incompatible Coils
Old wicks fail to absorb, or wrong resistance coils create pressure imbalances.
5. Damaged O-Rings
These tiny silicone seals are essential to maintain pressure—any crack or dislocation causes leakage.
6. Excessive Airflow Setting
Cranking the airflow wide open can let juice slosh out under vaping pressure.
7. Incorrect Device Orientation
Storing or vaping with the device sideways or upside-down makes gravity work against you.
8. Insufficient Coil Priming
Fire right after filling without allowing the wick to soak causes dry wicks and forced leakage.
🔎 Avoiding Vape Leaks: Effective Solutions
✅ Assembly Precision
Always hand-tighten parts—don’t overforce. Carefully inspect glass and threading before use.
✅ Leave Headspace
Fill only to the indicated max line. A little air gap protects against leakage.
✅ Use Balanced Juice
If using a high VG e-liquid, pair it with a coil designed for dense fluids or use a PG-rich blend.
✅ Replace Coils Regularly
Once vapor production dims or taste changes, swap coils (every 1–2 weeks typical depending on use).
✅ Check and Seal O-Rings
Inspect seals before assembly. Lubricate lightly with vape-safe silicone if needed.
✅ Adjust Airflow Smartly
Start with moderate airflow settings; test what balances vapor and leak control.
✅ Vape Upright
Always hold the device vertically when burning; store in that position to keep pressure stable.
✅ Prime Your Coil
Drip a few drops onto the cotton, then fill the tank. Let it sit 5–10 minutes before firing.
🚫 Leak Troubleshooting: Stop Juice Dribbles Step-by-Step
- Disassemble and clean tank, coil, and connectors with warm, clean water.
- Inspect all seals and threads, reassemble carefully.
- Insert a fresh coil, prime it, and fill below max line.
- Wait, then fire at a low wattage for the first few puffs.
- Observe closely; if leaking persists, retry cleaning or contact support.
📦 The 5 Most Common Leakage Causes (Fast Recap)
- Loose parts → re-tighten
- Overfill → leave headspace
- Thick liquid mismatch → change juice or coil
- Old coil → replace
- Faulty O-ring → swap seal
Each fix takes minutes and solves a typical root cause.
🔧 Preventive Strategies That Work
- Weekly tank and coil cleanings
- Scheduled coil swaps
- Stick to premium e-liquids
- Use precisely compatible coils and wattage
- Store device upright at all times
These steps eliminate nearly all everyday leaks.
❌ When Leakage Persists: Technical Deep-Dive
If leakage continues after all above steps:
- Inspect tank glass for cracks or stress fractures.
- Examine airflow and fill valve pins for distortion.
- Check 510 connectivity on the battery/mod—pressure or misalignment can push juice upward.
These deeper checks often solve stubborn leakage issues beyond simple user error.
🧠 A Complete, Smarter Approach to Vape Leak-Free Experience
By combining:
- Quality parts and setup (coils, juice, seals)
- Careful handling and orientation
- Maintenance and timing
You create a robust system that resists leakage and maintains performance. If followed consistently, your vape becomes reliable, clean, and satisfying.
In closing, this guide has shown you:
- ✅ The real reasons your vape might leak
- ✅ Practical solutions for each scenario
- ✅ Preventive tips to maintain performance
- ✅ How to troubleshoot edge cases

Understanding Vape Leaks: Common Causes and Solutions
Importance of Addressing Vape Leaks
Vape leaks can turn what should be a pleasurable experience into a frustrating ordeal. Addressing these leaks is crucial for several reasons. Firstly, it ensures that users are getting the most flavor from their e-liquids. A leaking device can dilute the taste, leading to a disappointing vaping experience. Secondly, leaks can lead to wasted e-liquid, which is both costly and inefficient.
Regularly checking for leaks can also extend the lifespan of your vape device. Just like any other electronic device, a poorly maintained vape can experience more significant issues over time. By tackling leaks promptly, vapers can keep their devices running smoothly.
Common Frustrations Caused by Vape Leaks
Every vaper has experienced the annoyance of e-liquid dripping from their device. Here are some common frustrations stemming from vape leaks:
- Loss of Flavor: When the coil is leaking flavor, users may find their favorite e-liquid tasting dull.
- Sticky Mess: E-liquid on hands, pockets, or bags leads to a sticky disaster that no one wants to deal with.
- Costly Waste: Constantly refilling a leaking tank not only wastes juice but also money.
Understanding and addressing these issues not only enhances your vaping experience but can also prevent further mechanical problems down the line.
Top Reasons Why Your Vape is Leaking (And How to Fix It)
Overfilling the Tank
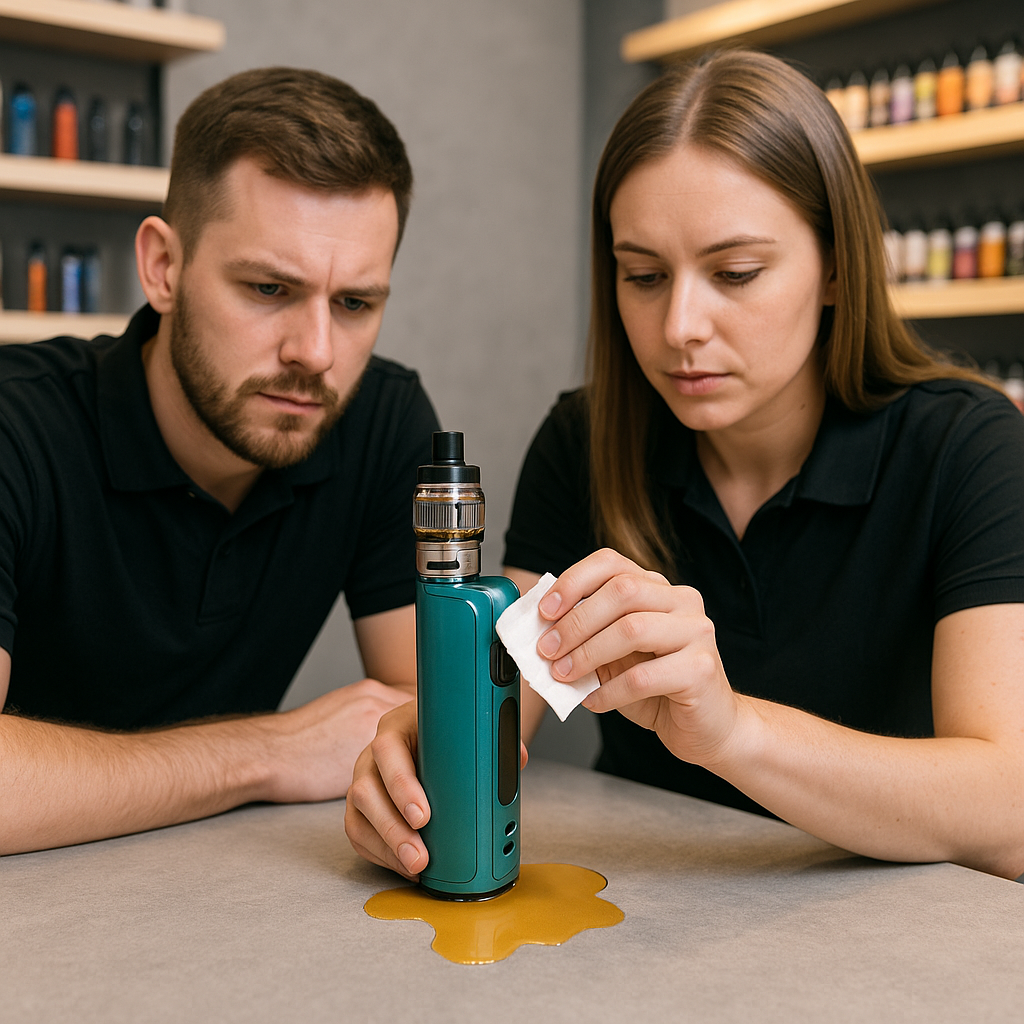
One of the most common culprits of vape leaks is overfilling the tank. It might seem harmless to pour a little extra juice into your tank, but doing so can create excess pressure, leading to leakage. That embarrassing moment when you find liquid pooling around your device could very well be due to this simple mistake.
How to Fix It:
- Always leave some space at the top of the tank to allow for air pressure.
- Use a syringe or dropper for precise refilling.
Damaged O-Rings
O-rings play a crucial role in sealing your vape. If they’re damaged, it can lead to leaks. These small rubber gaskets may wear down over time due to heat or e-liquid exposure, compromising their effectiveness.
How to Fix It:
- Inspect your O-rings regularly for signs of damage.
- Replace them if they appear cracked or flattened.
Loose Parts
Loose connections between the tank and the mod can also result in leaks. If the tank isn’t screwed in tightly, liquid can escape.
How to Fix It:
- Ensure everything is snugly connected, but avoid overtightening, which can damage parts.
Incorrect Coil Installation
Another common issue is incorrectly installing the coil. If it’s not seated properly, e-liquid can leak out instead of vaporizing.
How to Fix It:
- Take a moment to double-check the coil placement. It should fit securely in the base without gaps.
High PG E-Liquids
While high PG (propylene glycol) e-liquids provide excellent throat hit and flavor, they can also lead to leakage due to their thinner consistency.
How to Fix It:
- Consider switching to higher VG (vegetable glycerin) e-liquids that are thicker and less prone to leaking.
Understanding these common reasons for vape leaks helps users take proactive steps, ensuring a more enjoyable vaping experience without the nuisance of leaks.
Fixing Vape Leaks: Essential Tips for a Hassle-Free Experience
Regular Maintenance
To keep your vape functioning optimally, regular maintenance is essential. Just like caring for any gadget, a little attention goes a long way in preventing leaks. This can include cleaning the tank and connections, as residue can hinder proper seals.
Tips for Maintenance:
- Clean your tank and mouthpiece with warm water weekly.
- Check O-rings for wear and replace as necessary.
Proper Storage
How you store your vape can significantly impact its performance. If you toss it into your bag upright, you might find unexpected leaks upon retrieval. Storing your device horizontally or upright can help maintain integrity.
Storage Best Practices:
- Keep your vape in an upright position.
- Use a protective case for travel to prevent damage.
Temperature Control
Temperature fluctuations can also lead to leaks. E-liquids expand when heated, creating pressure that may force liquid out if the seals are compromised.
Tips for Temperature Control:
- Avoid leaving your vape in hot cars or direct sunlight.
- Store in a cool, dry place whenever possible.
By implementing regular maintenance, proper storage, and temperature control, vapers can significantly reduce the chances of leaks, leading to a smoother, more enjoyable vaping experience.
Troubleshooting Your Vape: Identifying and Repairing Leaks
Locating the Source of the Leak
When faced with a leaking vape, the first step is to locate the source of the leak. This can be a bit like a detective game, and you might be surprised at how many areas can be culprits. The most common spots include the tank, coil, and O-rings.
Steps to Identify the Leak:
- Visual Inspection: Look for e-liquid pooling around the base of the tank, which can indicate loose parts.
- Check Connection Points: Tighten all connections; if they still feel loose, there might be an issue with the thread or O-ring.
- Turn It Upside Down: If e-liquid drips out from the tank, you may need to check the seal on the coil.
Fixing Specific Issues
Once you've identified where the leak is coming from, addressing the issue becomes much easier.
Specific Fixes:
- If the O-Ring is Damaged: Replace it; they’re usually inexpensive and easy to find.
- If the Coil is Loose or Incorrectly Installed: Reseat the coil securely to ensure it's properly connected.
- For Overfilled Tanks: Simply drain some liquid to prevent excess pressure.
By following these troubleshooting steps, vapers can not only fix existing leaks but also develop a better understanding of their devices, leading to a more satisfying vaping experience in the future.
Why Is My Vape Leaking? Causes, Prevention, and Solutions
Understanding Vape Anatomy
To effectively tackle vape leaks, it’s essential to understand the basic anatomy of your device. The key components include the tank, coil, and O-rings.
- Tank: This holds your e-liquid; any crack or damage can lead to leaks.
- Coil: It heats the e-liquid to produce vapor. If not installed correctly, it can create gaps that allow e-liquid to escape.
- O-Rings: These seals are crucial for maintaining tight connections between the tank and coil. Damaged or worn O-rings often lead to leaks.
By knowing how these parts interact, vapers can better diagnose problems.
Strategies for Leak Prevention
Preventing leaks is much easier than fixing them. Simple strategies can help minimize the likelihood of e-liquid escaping.
Preventative Tips:
- Regular Inspections: Frequently check O-rings and tank for wear and tear.
- Mind Your Fill Levels: Avoid overfilling your tank and always leave space for expansion.
- Proper Assembly: Ensure all components are securely tightened but not overly so, as this can cause damage.
By incorporating these strategies into your vaping routine, you can greatly reduce the risk of leaks, allowing for a more enjoyable experience without interruptions.
The Complete Guide to Preventing and Fixing Vape Leaks
Inspect and Replace
To keep your vape in prime condition and prevent leaks, regular inspection is vital. Take a few moments to check the condition of your tank, coils, and O-rings. A little proactive maintenance can save you a lot of hassle down the road.
Inspection Checklist:
- Tank: Look for cracks or signs of wear. If damaged, replace it promptly to avoid leaks.
- Coils: Check for any burnt or discolored cotton. If the flavor starts to taste funky, it’s time for a new coil.
- O-Rings: If they're cracked or misshapen, replace them quickly. They ensure that all connections are secure.
DIY Vaping Solutions
If you're leaning towards a hands-on approach, several DIY solutions can help fix common leaks. For example, changing the wicking material in your coil can dramatically improve its efficiency.
DIY Tips:
- Changing Wicking Material: Use high-quality cotton wicks that can absorb e-liquid effectively to reduce leakage.
- Checking Airflow: Ensure that airflow holes are not blocked, as this can cause pressure issues leading to leaks.
By performing regular inspections and implementing some simple DIY fixes, you can effectively maintain your vape and enjoy an uninterrupted vaping experience.
Understanding Vape Anatomy: Key Parts That Lead to Leaks
Function of Tank
The tank is the heart of your vape device, holding the e-liquid that you enjoy during each puff. It’s designed not just for storage but also to provide a seamless flow of liquid to the coil. A well-functioning tank ensures your e-liquid remains contained and accessible.
Key Features:
- Material: Most tanks are made of glass or plastic. Glass tends to be more durable and resistant to scratches, reducing the risk of leaks.
- Design: Look for tanks with secure threading and locking mechanisms to prevent accidental openings.
Function of Coil
The coil is the component that heats up your e-liquid, converting it into vapor. It’s a crucial part of the vaping process, but improper installation or wear can cause leaks.
Coil Considerations:
- Wicking Material: A good wick absorbs and channels e-liquid effectively; if it’s too tight or loose, it can lead to leaks.
- Installation: Always ensure coils are seated properly to create a complete seal.
Function of O-Rings
O-rings are small but mighty components that create airtight seals between the tank, coil, and other parts of the vape. Their primary function is to prevent leaks from occurring through gaps.
Why O-Rings Matter:
- Material Quality: High-quality rubber O-rings resist wear and tear better than lower quality ones.
- Regular Checks: Inspect O-rings for any signs of damage; replacing them can save your device and juice from unnecessary loss.
Understanding these key parts helps vapers identify potential issues before they lead to leaks, enabling a smoother vaping experience.
DIY Solutions for Common Vape Leak Problems
Changing Wicking Material
One of the most effective DIY solutions for preventing vape leaks is changing your wicking material. Over time, wicks can become saturated or burnt, leading to poor e-liquid absorption and resulting in leaks.
Tips for Changing Wicking Material:
- Material Choice: Opt for 100% organic cotton wicks for superior absorption and flavor. They tend to hold e-liquid better and are easier to work with.
- Proper Installation: Trim the wick so that it’s just long enough to reach the coil without being too tight. A snug fit ensures efficient liquid delivery without causing overflow.
Having experienced a sudden leak during a vaping session, switching to a quality organic wick made a noticeable difference in performance and flavor.
Checking Airflow
Another simple DIY solution is to check and adjust the airflow settings on your vape device. Proper airflow is essential for maintaining even pressure throughout the tank.
How to Optimize Airflow:
- Adjust Settings: Many modern devices allow you to customize airflow restrictions. Test different settings to find the perfect balance between vapor production and preventing spit-back or leaks.
- Clear Blockages: Ensure that airflow holes aren’t blocked by residue or debris, as this can cause back pressure and lead to leaks.
By focusing on these DIY solutions, vapers can effectively tackle common leak-related issues, ensuring a smoother and more enjoyable vaping experience every time.
How to Identify and Fix E-Liquid Leaks in Your Vape Device
Device Inspection
Identifying the source of e-liquid leaks starts with a thorough inspection of your vape device. Taking the time to look closely can save you from further frustration down the line.
Inspection Steps:
- Check the Tank: Look for visible cracks or damage; even tiny fractures can lead to significant leaks.
- Examine Connections: Ensure that the tank is tightly screwed to the device and that all parts are seated properly.
- Inspect the Coils and O-Rings: Check if the coils are adequately installed and if any O-rings need replacement, as worn-out seals are common culprits for leaks.
After noticing e-liquid pooling on my desk, a quick inspection revealed a loose coil that needed tightening.
Effective Leak Solutions
Once you've pinpointed where the leak is coming from, there are several effective solutions to consider.
Solutions Include:
- Replace Damaged Components: If the tank or O-rings are damaged, replacing them is often the best long-term solution.
- Reinstall Coils: Remove and reseat the coil to ensure a proper fit and seal.
- Adjust Filling Technique: When refilling, always leave a little air space in the tank to prevent overpressure.
These steps not only help in fixing existing leaks but also empower you to maintain your vape device proactively, ensuring a hassle-free vaping experience.
Expert Tips on How to Stop Your Vape from Leaking Once and For All
Seeking Advice from Experienced Vapers
One of the best ways to learn how to prevent leaks is by tapping into the wisdom of experienced vapers. They’ve likely encountered many of the same issues you face and can offer invaluable insights.
Where to Seek Advice:
- Online Forums: Websites and platforms like Reddit have dedicated communities where vapers share their experiences and solutions.
- Social Media Groups: Join vaping groups on platforms like Facebook to connect with others who can offer tips based on real-life experiences.
- Local Vape Shops: Engaging with staff at vape shops can provide personalized advice tailored to your specific device and setup.
After conversing with a fellow vaper who had similar frustrations, I learned about optimal filling techniques that significantly reduced my leaks.
Implementing Leak-Free Solutions
To effectively keep your vape leak-free, implementing a few key techniques can make a difference.
Proven Solutions:
- Proper Filling Technique: Always fill your tank slowly, ensuring you don’t spill over and cause excess pressure.
- Regular Maintenance: Make it a habit to inspect and clean your vape device regularly, checking for any damaged parts that need replacing.
- Seasonal Adjustments: Be aware that temperature changes can affect your vape; in colder climates, thicker liquids might be better suited to prevent leaks.
By seeking advice from seasoned vapers and implementing these leak-free solutions, you can enjoy a seamless vaping experience without the hassle of leaks interrupting your day.
OXVA is a leading brand in the field of manufacturing vape products.
Elf Bar is a leading e-cigarette brand, known for offering ready-to-use vape devices.
Geek Vape is one of the leading companies in the vape devices and related accessories industry.
DZRT Nicotine Pouches is one of the brands specialized in nicotine pouches.
Ripe Vapes is a well-known company in the manufacture of electronic cigarettes and e-liquids (flavors).
Roll Upz is a well-known brand in the e-liquid industry.
Grand Vape (or Grand) is one of the companies specialized in manufacturing vape devices and electronic liquids.
Browse by most popular vape brands
Gummy is a specialty brand.
SMOK is one of the most popular brands.
Sams Vape is a well known brand.
DR.VAPES Dr.Vapes is one of the well-known companies
JUCY JUCY Flavors are a range of flavors used in electronic vaping.
Browse by most popular vape brands
Products of the brand Mood Vape Company
Disposable disposable syringes
Electronic vape and hookah devices
Salt and vape flavors for molasses and electronic hookah
Accessories, coils, supplies and pods for electronic devices